
Your WD Vendor Dashboard allows you to add and remove photos from the Image Gallery section of your WD Profile page. Below are the steps to follow:
Gallery Slider Images
Add Photos to WD Profile Gallery Section
- Log in to your WD Vendor Dashboard.
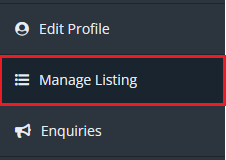
- Click on the Manage Listing option from the menu items.
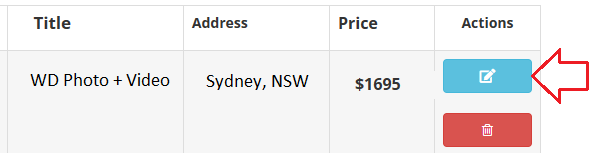
3. Click on the Edit Icon which will then lead you to the Edit Listing page.
4. Scroll down until you reach the Upload Images section of the dashboard.
5. Click on the Drag & Drop to upload new photos from your local device.
Reorder, Set as featured and delete gallery photos
6. Each of your uploaded gallery images will show 3 icons on the top right section.
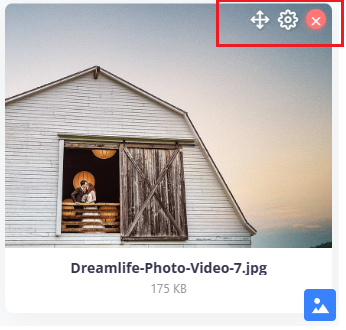
7. Use the 4-arrows icon to reorder the photos in your gallery slider.
8. Use the Gear icon to sent an image as featured. The featured image will then appear as the primary image in your WD directory pages.
9. Use the Cross icon to delete photos from your gallery slider images.
10. Scroll down to the bottom of the page and hit the Submit button to save the changes.
Add, Update Logo / Photographer Profile Photo
- Log in to your WD Vendor Dashboard.
- Click on the Edit Profile section from the menu items.

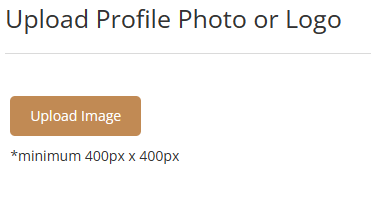
3. Click on the Upload Image button and select photo from your local device. The dimension requirements for the image are a minimum of 400×400 pixels.
4. Click on the Submit button to save the changes.
Important Links